Euphorbia Francoisii is an exotic species of succulent in the family Euphorbiaceae. It is endemic and originates from Madagascar. It grows in semi-arid tropical forests and thrives in temperatures and humidity similar to Singapore.
Euphorbia Francoisii in the wild have very narrow leaves and are mostly green with pale colours. The variety, crassicaulis, is one of those with more distinct patterns and red coloured leaves and is the one the hybrids originated from.
Appreciating the Euphorbia Francoisiihybrids
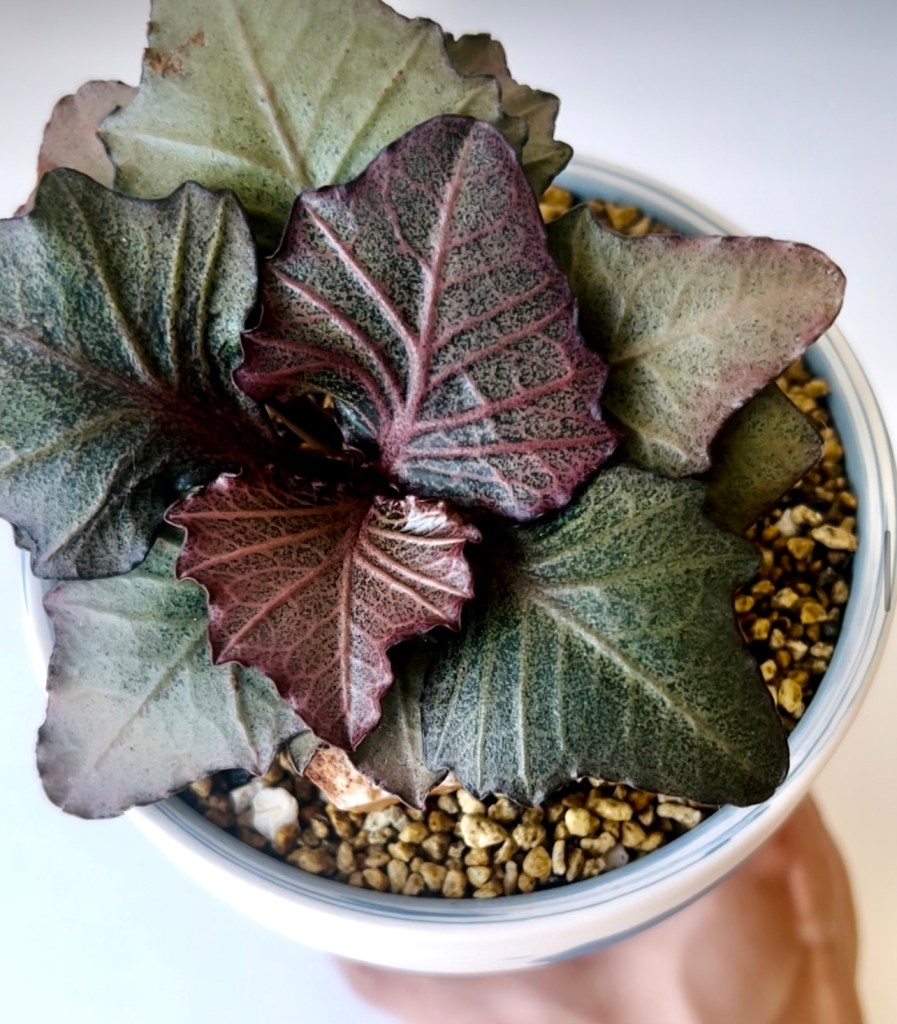
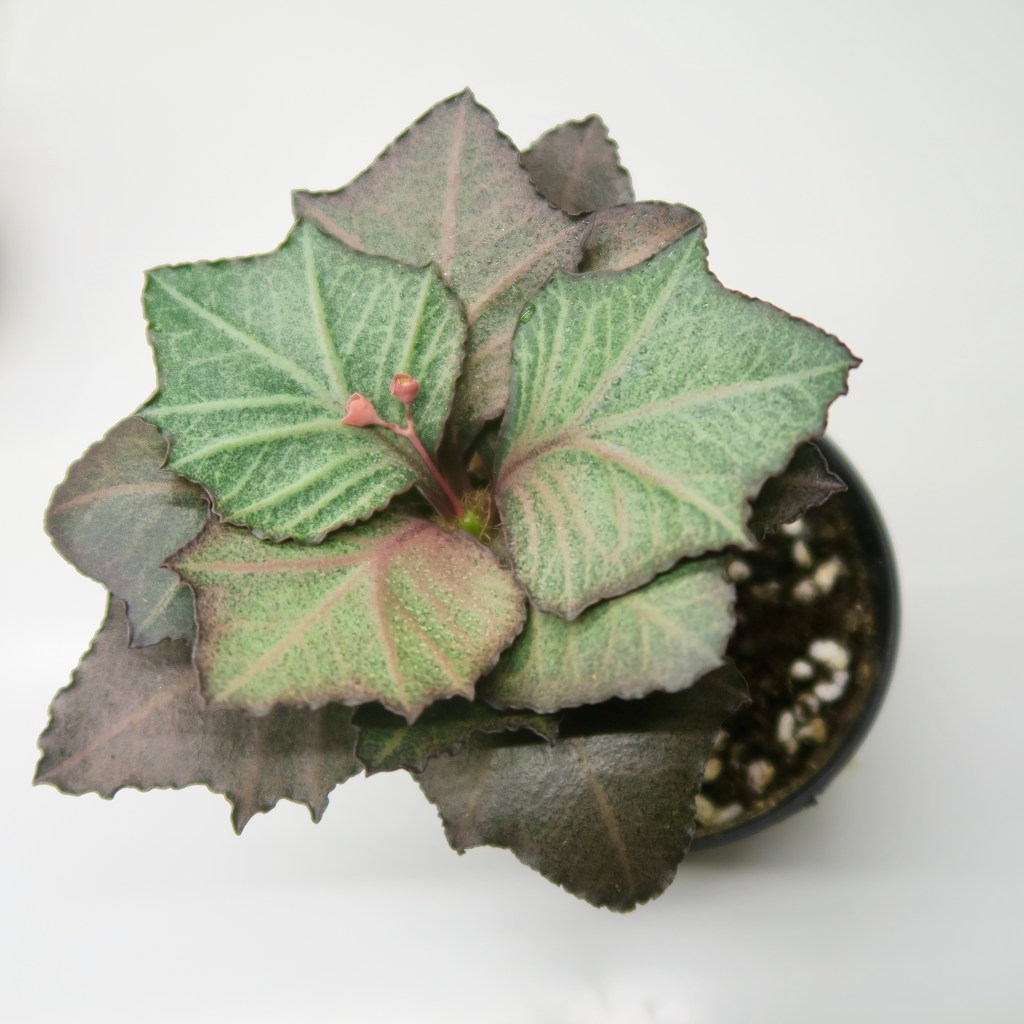
The ones available in our store are really attractive with strong vein lines and unique shapes and colours of leaves. They were all cross bred specially by growers from different plants, sometimes even with a current hybrid just so to create a unique set of plants that have the most unusual leaf forms and pretty colours. Each one in our store is bred and created by an award winning expert breeder. And the highlight is that each of them is special and unique with no two E. Francoisii hybrids looking alike. There are no twins.
The E. Francoisii hybrids are best viewed and admired from looking top down at their foliage .
Stunning colours & leaf shapes
Generally, breeders grade the leaves of the E. Francoisii hybrids from 3 distinct features : the leaf form, the colour of the leaves including the leaf veins and the consistency of the leaf characteristics. And how perfect they are to these 3 factors determines its popularity and the price.
Leaf forms
Leaf is wide with a broader leaf surface and short petiole. The shape is special and usually not narrow like those found in the wild. It has a very unique shape sometimes like a ivy gourd leaf shape. The best ones are formed so well, you can’t see the soil substrate when viewed from the top.
Colour of the leaves
Veins are clear and distinct. All colours on the leaf are clear and bright.
Consistency of the leaf characteristics
Starting from the bottom leaves to the top foliage, all the leaves have similar characteristics and look almost the same especially in shape.
Plant Care
Moisture Water the when substrate is almost dry at the bottom. When watering, water generously till water drains out of pot. Although the Euphorbia Francoisii hybrid is a very hardy plant, do not go long periods of drought without watering. When faced with a drought, it will start to drop its bottom leaves.
Light Low to medium light. You will see more growth when placed close to bright indirect light. Best in a spot with morning sun.
Check them out at our Joo Chiat studio.
If our little page here on the E. Francoisii hybrids have got you more interested in them, come on down and see the plants for yourselves at our Joo Chiat shared studio. Each Euphorbia hybrid plant here is unique and created by expert breeders who have won awards for cross-bredding and growing these unique plants. #notwoalike
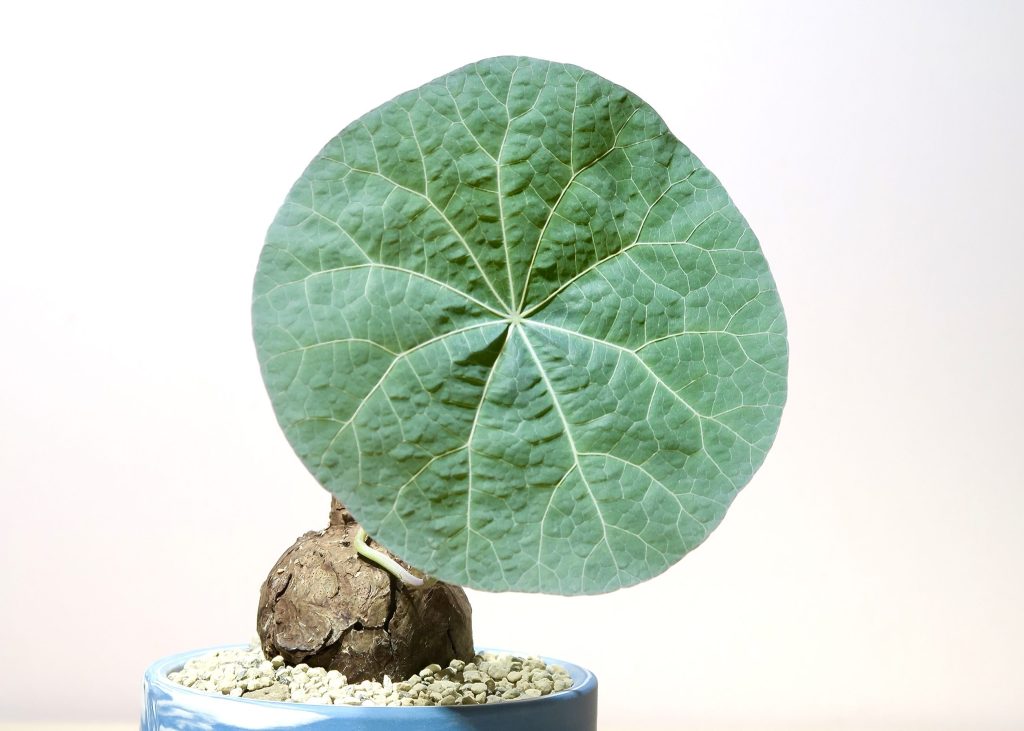
A cute caudex plant that is usually found in the mountains, the Stephania Kaweesakii Novas has beautiful round leaves with prominent vein lines that can go as big as 20cm in diameter and can even display a stunning neon green or dark turquoise colour when the leaves matured depending on the age of the plant.
Appreciating the Nova
Growing the Nova
The Stephania Kaweesakii Novas we have sourced often arrived as a bulb without any leaves or roots. We start off and grow the plant from the roots first to a healthy plant that has stunning looking leaves. This can be a slow process, sometimes as long as four months which involves first nurturing and growing out the plant’s roots which at times requires even sacrificing its leaves first. But this will then guarantee a healthy plant with a robust set of roots and one which is capable of producing big stunning leaves with prominent vein lines, and colour. Our Stephania Kaweesakii Nova plants also enjoy a longer life if they are given the right care when they are adopted.
Stunning Leaves
The Nova’s stunning leaves can come in different forms and shapes, but the Novas are often collected for its leaf size, the roundness and at times symmetrical heart-shaped leaves and of course the colours. The pretty neon green or dark turquoise colours and the prominence of its vein structure makes it attractive looking like a beautiful flower sprouting from the caudex. This is what many Stephania Kaweesakii Novas fans like to see in their novas. An overall attractiveness determines its popularity and value.
Caudex/bulb
The caudex is where it stores most of its nutrients and its moisture, but it also plays a part in its attractiveness. Its resemblance to any animal like a rabbit or even a mountain adds on to its exoticness. It is also often valued for the size of its bulb since its size determines its age.
Check them out at Joo Chiat
Don’t believe our stunning Stephania Nova pictures or our page here got you more interested? Come on down and see the Novas for yourselves at our Joo Chiat shared studio.😊 🏡
Plant Care
Water Drought tolerant. Water when substrate is completely dry. Most novas will droop its leaves when it is thirsty.
Light Place in a spot where there is bright indirect light. Direct light will burn its leaves.
Care Tips Less is more. If in doubt, do not water. Similar to all caudex plants, they are drought resistance due to the water stored in their caudex.
Its leaves often reveal how it is doing. It will always look sickly and off colour if it’s not well. It could be a case of pests, a watering issue or just a light issue that troubles it but every time you will see it on its leaves. Look closely and you will see what is troubling it.
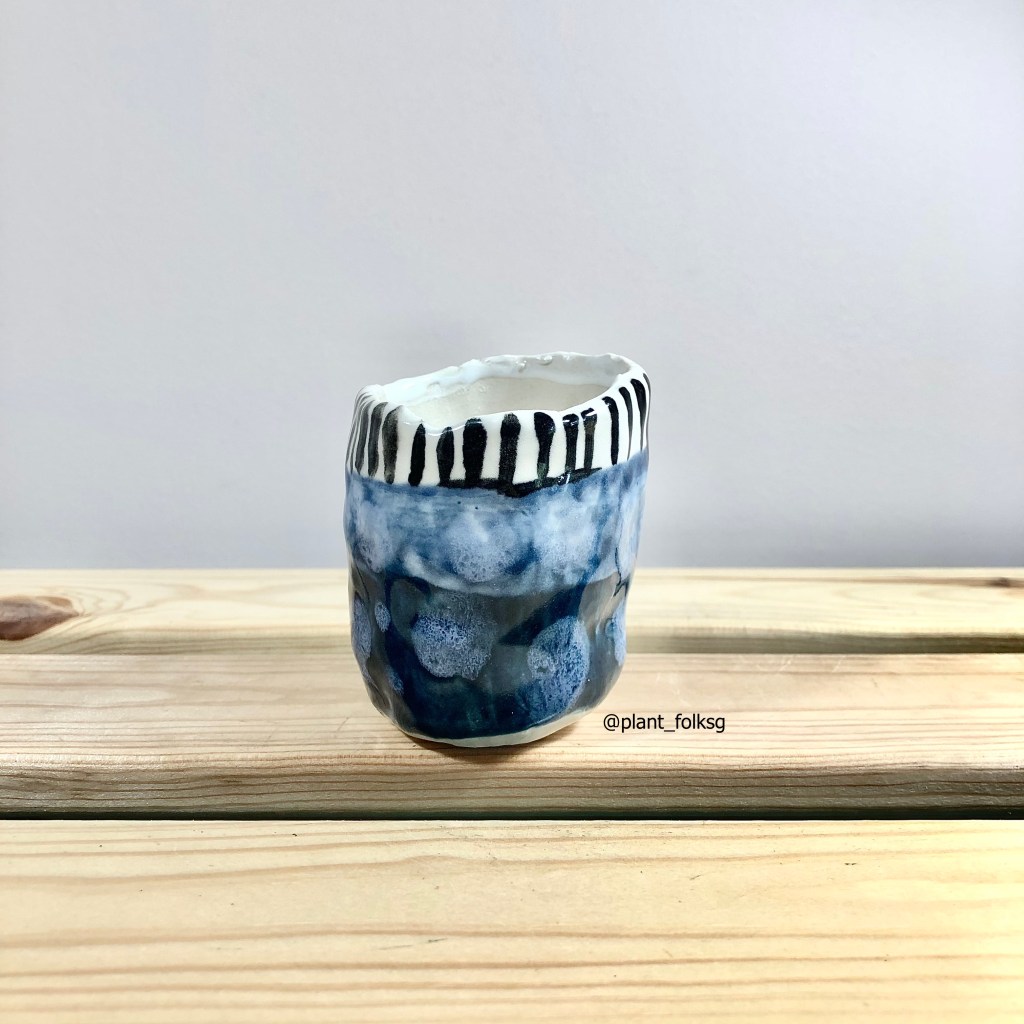
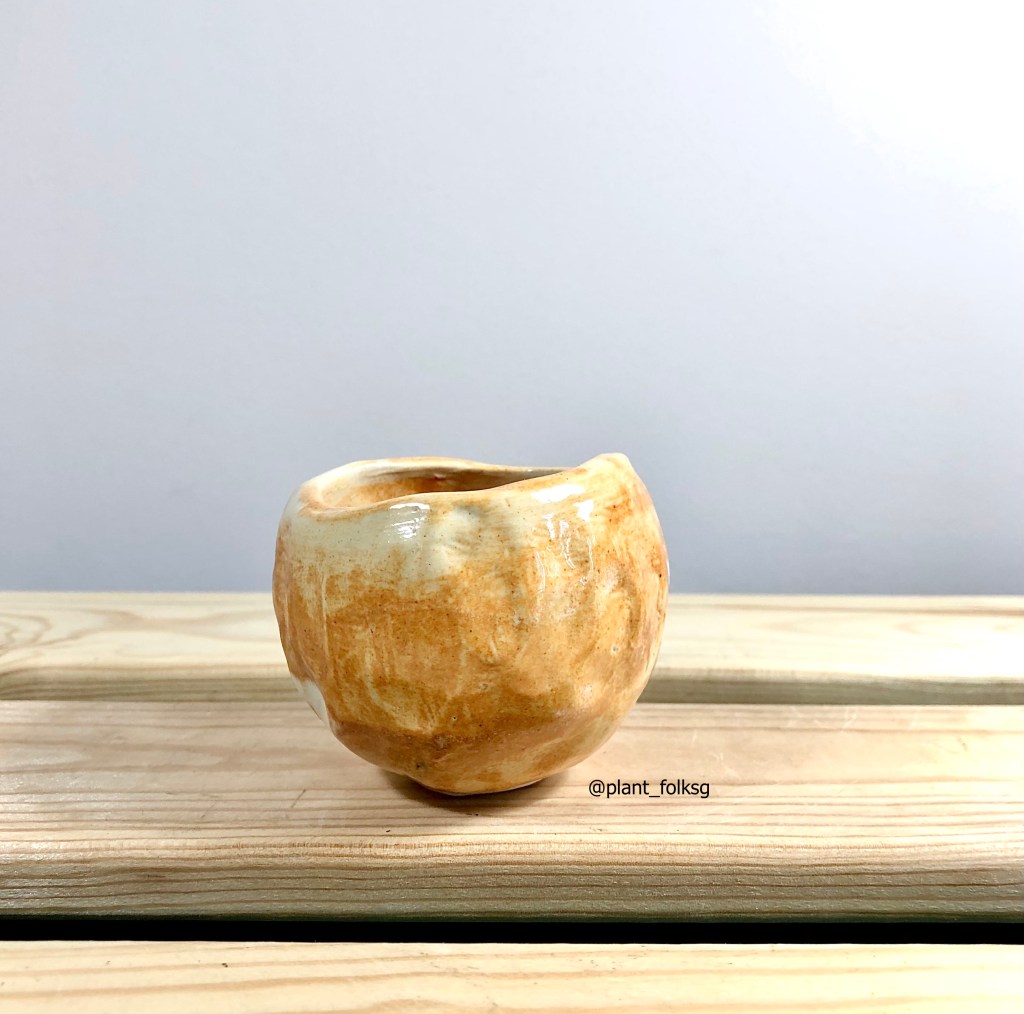
Lerae is a talented ceramist based in Singapore known for her beautiful handcrafted ceramic planters and tableware. Her minimalist inspired designs are created to perfection with her skilful throwing of artistic forms and shapes . We love her unique style especially in our signature bee-hive planters. Find out about her in our chat below. Lerae @llerae.makes
How did you get started in ceramics? Tell us your story. I started learning ceramics in 2015. Initially, I set out just to find a new hobby as I really enjoy being a complete beginner and learning new skills from scratch. There are so many different aspects to pottery, so I am able to continue taking lessons for a few years without ever feeling bored. Over the years, I have really grown in love with the craft and have decided to turn it from a hobby to a full-time job in 2020.
Any recent highlights to share? A huge highlight for me would be having my own online webstore. It feels like an important milestone and I think it makes for a better shopping experience for my customers since they can now view a proper catalogue of products.
What would you think best describes your style? I enjoy creating works with a muted palette but energetic forms.
Where do you draw your inspiration from? I draw my inspiration from really anywhere. Besides using social media, I love to observe what kind of ceramics people actually use in their homes. If I do eat out, I pay attention to the kinds of tableware restaurants use.
Tell us more about the method, process and details when creating one of your planters? What are the pains and rewards? There is usually an extended planning period at the beginning. For commissions, I love to involve my clients to get to know their vision and iron out the specifics like proportion and size, which I gather is pretty important depending on the type of plants intended for the planters. To create the planters, I throw and trim on the wheel. Next, the pots will be glazed and sent for firing.
It warms my heart to see beautiful plants housed in my planters! Nothing feels more rewarding than knowing the ceramics that I have created are being put to good use. On the flip-side, as the process can be tedious, it can be somewhat painful when things don’t go well and pieces have to be remade.
Plant FOLKS x Lerae handcrafted beehive planters
I think you can definitely find designs that are more unique if they were handcrafted as compared to mass-produced ones. The Lerae X Plant FOLKS collection are all individually designed by us and you would not be able to find similar designs from fast retail shops. In addition, as each piece is crafted by hand, you can see differences in form or glaze across pieces, and this makes each piece more unique. Plus, handcrafted planters have a certain “warmth” to them when you know that each one has been carefully and painstakingly made by hand.
lerae on fast retail & Locally handcrafted planters
Are handcrafted ceramic planters worth the price? For sure! But it is rather subjective and whether the price is justified ultimately boils down to your lifestyle and what you care about.
Tell us about a personal favourite planter (created by you). A personal favourite of mine is the tripod planter – the feet are super cute!
What materials most fascinates you when creating a work? I am fascinated the most by glazes. There are many different combinations to work with, so the process of picking a glaze is never dull. In my opinion, it has as much impact as the form on the overall look of a piece.
Plant FOLKS x Lerae handcrafted Ring planters
What does quality mean to you? A well-made utilitarian ceramic product needs to have a good balance between functionality and aesthetics . Weight, thickness, form and food safety are all important considerations. If it is meant for everyday use, it should also feel comfortable to hold it.
Planter-wise, it needs to have a relatively high degree of porosity as compared to other forms of ceramics and be of a good proportion for whichever plant intended.
What is your favourite plant? Tell us about the planter you would like to create for it? My favourite plant is the ZZ plant (Zamioculcas zamiifolia)because it is so resilient and refuses to die on me. When it outgrows its current pot, I am likely to make a terracotta one with a simple matte white glaze for it.
ZZ plant loved by many for its easygoing nature and attractive glossy foliage
Hoya Series: A Hoya series to share some of our experiences & tips uncovered while growing this hardy but beautiful plants. Stay tuned… By: Danny (All photos belong to plant folks. please credit if you are using them)
One thing about Hoyas that many Hoya lovers including me find attractive other than their exotic foliage and pretty blooms is really their hardiness and ability to survive and grow in difficult conditions, even in lesser light areas. Hope the Hoya tips will be useful to anyone who are growing Hoyas.
Ask any Hoya owner and they will tell you that this is definitely a high-light plant, although they prefer being in the shade most of the day. Morning sun which has a few hours of bright light is good to keep them going and some has even bloomed for me. Although I started growing Hoyas for their beautiful jungle foliage, their blooms are equally a treat. I will try and share my experiences and Hoya tips on growing them here indoors.
Hoya Environment
Hoyas are epiphytes and in the wild they mostly live on trees and some in rocky areas in the tropical countries of Asia and pacific areas like Australia and Papua New Guinea. They are usually from an environment that is hot, wet and high in humidity. This is something we need to keep in mind when growing Hoyas.
In Singapore where I lived, it is hot and humid so I tend to grow Hoya species that are from a similar environment. Although I have some Hoyas like them, I tend to avoid growing those that are from a cooler environment usually from the mountains. For example, Hoya species like Linearis and Globulosa. Here are some Hoya tips. Grow these Hoyas if you can give them a cooler environment. You can do this by keeping them in a cooler corner in the house and misting them a few times a day. Keeping them cool with the air-cooler or air-conditioner is a good idea.
Foliage
One reason for their unique shape and beautiful jungle-like foliage is the environment they lived in. The leaves often give you a hint to their living conditions and the care that is needed. As a Hoya grower, I always think these are really useful to know. Here are what some of the signs mean.
Succulent leaves– the hoya is from a drier environment and do not need to be watered that frequently because they can store water in the leaves for example my hoya burtoniae below could last more than a week without watering. Small leaves– the hoya grows in an environment that is bright and so they need a lot more light than a big leaf hoya. For example, the small leaves of the hoya krohniana eskimo needed stronger light to grow well. Thinner, darker, larger leaves – these characteristics usually come together and they generally mean the hoya is from a darker, wetter environment. Thinner leaves usually mean they need more watering and the larger leaves always means they need comparatively less light since their natural environment has very little.
The beautiful small splash leaves of the dainty Hoya Curtisii requires more and stronger light than the other hoyas to grow really well.
(Hoya curtisii seen here in hanging artisan planter here is available in our online shop. check it out.)
Light
Most Hoyas generally need really high light to do well. This is especially true for the ones with really tiny leaves. But they do so in doses of dappled light and not direct light. If they are placed in direct afternoon sun, the sun’s intense heat will burn them.
They really do best in a few hours of bright light in the morning at an east facing window, or a few hours in the south facing window. And most Hoyas like to be in the shade most of the day after taking in that intense light.
I have my Hoyas at the east-facing window that receives a few hours of dappled direct sun and I also supplement them with more light at night using grow lights. They are in the shade most of the day. Whether it is with natural light or grow lights, if you can grow them with close to 25000 lux (needed for high light plants) for at least 4 to 5 hours a day in addition to your normal morning sun, it would be sufficient for the Hoyas to grow well. Give your Hoyas additional light at night if they are in the shade most of the day.
Watering
If you have them indoors, water the Hoyas when the substrate is dry out. This is true for most species. Some Hoyas for example the Hoya Multiflora may like to hold more moisture and you can water them slightly earlier. While most Hoyas like to dry out, long spells of dryness will wither them, and they may not recover even when deeply watered. If you have Hoyas in coco substrate, it is best to shower them and spray straight into the substrate so that the water can reach the roots. Hoyas also like a good shower like all jungle plants to wash away the dust and dirt on them and cool them down. Some extra tips below on signs to water them from our Instagram post. Check out the third slide for the Hoya’s shrivelled, crinkled leaves.
Hoyas can survive quite well without too much fertilizers used but they will not grow very much. If you have your Hoyas in coco husk or coco peat with no organics in it, slow-released fertilizers are a minimum. Supplement this with a slightly weaker balanced fertilizer in the likes of npk 10-10-10. Being epiphytes and growing up in trees, they obtained their natural fertilizer from natural environment like bird droppings and so love an organic feed. So, it will be better to use those rather than a chemical one. I have mine on slow release osmocote 15-9-12 with trace elements as well as a weekly organic spray and some plant boosters.
Taking good care of your Hoyas will result in a happy plant with fuller and more beautiful blooms
Substrate
If you are those who buy their Hoyas from nurseries instead of growers, you will have a lot of them in a coco husk mix. If the Hoyas’ roots are not wrapped too tightly and grown into the mix, it will be best to change them. This is because coco husk although good for rooting Hoyas tend to dry out very quickly and even if you are an indoor grower, before the week is up, you may need to water them again. And if the coco is really old and hard, they will not hold any water at all and the Hoyas will be in long spells of dryness. It will be good to use a loose organic mix, with compost, coco peat and pumice rocks in them.
BACSAC® pots are porous and breathable and good for aroids. The material prevents rot and allows the roots to breathe by draining off excess water through the porous textile. In fact, plants grown in BACSAC®’s fabric pots have stronger root development and a denser structure. When the roots reach the fabric wall, the contact with air through the porous material stops them from elongating further and the plant develops new roots instead. Below are some tips on growing and watering your aroids in BACSAC® pots.
Fill directly with soil, paying attention to stretch the fabric before planting. You do not need any drainage material at the bottom.
2. Use well-draining soil for your aroids like you always do so that the water can trickle through. Water through so that the bottom of the pot is wet and the excess water flows out. BACSAC® pots are permeable and allows water to flow out very easily to over root rot.
3. Wait to see if water flows out of bag after your first pour of water. Wait for the water to soak into the soil and bag before watering again to avoid overwatering.
4. Watering schedule can be lengthened as the geotextile felt layer protects and contains the roots, limits evaporation and distributes water. This is especially beneficial for plants like Anthuriums that may need to retain more moisture. This could be different for plants in your environment so always remember to check soil for moisture before watering.
5. If you need to repot another plant, just give the BACSAC® pot a good wash and you are good to go. BACSAC® pots are durable and sustainable, and can last a good 7 to 10 years.
BACSAC® is a French brand that designs flexible planters, garden accessories, and everyday objects to bring you closer to nature. BACSAC®offers lightweight, breathable and user-friendly plant pots. Their pots allow easy moving of your plants anywhere from inside the house, outdoors in the garden, the balcony or your living space. BACSAC® is a new generation of plant pots for modern living with double-walled geotextile fabric, that maintains the equilibrium between air, soil, and water, replicating outdoor cultivation as closely as possible.
To tackle a lack of access to fertile soil, contaminated ground, and weight and space constraints, BACSAC® was created: a cultivable plot of land amid the concrete jungle. Their ambition is to offer a relevant, convenient, and sustainable solution that addresses multiple issues, reintroducing nature into the city and adapting it to any scale: from the smallest balcony to the grandest landscaping projects.
This is definitely what all of us in Singapore can appreciate and identify with.
As a plant owner, I learned the hard way that light is if not the most important ingredient a plant may need when growing. All the good fertilizer and plant food that you use on it will not matter if they do not receive the right amount of light. A plant that doesn’t receive enough light will usually look weak, pale no matter what you give it. It will also look really scrawny and the distance between each leaf or branch will be longer as the plant tries to grow taller in search of light. A lack of light also causes what we all fear; the plant’s vulnerability to root rot.
During the course of my plant journey, I at times struggle to give my plants the right amount of light especially during the darker months which I feel in recent times has grown even longer due to the climate issues we faced. Yes, even in bright sunny Singapore where there is just so much sun all year around. Besides those dark days, there are also consistently what I called dead spots or corners that I just can’t have any plants, even the low light ones will slowly falter.
And so, I will always have grow lights at home no matter how some may think that my living room is really bright. Staying in a flat, it’s just never bright enough.
Without going into some of these things below, it is hard to determine if a light is going to be of help to your plants. I will only focus on LED lights here because it is what I use at home since it is the most economical. All information are a combination of my research and a little of my experience when looking for lights. So check out a few things below I learn about grow lights that could make it easier for you if you decide to get one.
When looking for grow lights, look for light intensity measurements like PPF & PPFD
PPF (photosynthetic photon flux) is a measure of how much plant-usable light is released by a bulb per second and is measured in micromoles per second (μmol/s).
PPFD (photosynthetic photon flux density) is the number of photosynthetic photons landing on a particular surface, a square meter per second, like a plant leaf. It is measured in micromoles per second per meter squared (μmol/s/m2). PPFD goes down as your plants get further away from the light source.
If the light manufacture provides these measurements, it kind of gives me a heads-up on how much research and effort goes into making this light.
I would use the PPFD as it is a more accurate reading of a professional grow light as it shows how intense the light can be over an area. Light is good to use only if it pushes out strong enough light on the plant at any area; not strong or intense means there just isn’t enough light even if it lights up the place.
Buy only what you need
Light intensity for plants varies for different plants. Foliage plants tend to require stronger light than others. Too strong a light and you could be wasting the energy consumed and paying high electricity bills.
Low-Light Plants (suitable for a north window or a fairly dark corner) eg.African Violets, Tropical Begonias: 40–80 umol/m2/s PPFD
Medium- Light Houseplants (A medium-light plant would be suitable for east-facing windows or located near a west-facing window, but out of direct light) eg. Aroids like Anthuriums, Philodendrons ,Pothos : 80–350 umol/m2/s PPFD
High-Light Houseplants (For plants that need brightly lit locations such as south- or southwest-facing windows): 350 – 600 umol/m2/s PPFD
Important point to note is that the intensity of the light can be increased if you have them closer to the plant. The PPFD will increase when they are closer. Check with the light manufacturer, if it is possible, the distance their PPFD is based on. This will allow you to better maximised your grow light.
Plants love and need a certain spectrum of light, so look out for PAR
PAR (Photosynthetically Active Radiation) measures the quality of the light plants needs in nonometers (nm). It’s the part of the light spectrum 400 to 700 nanometers (nm) that plants predominantly use for photosynthesis and this is composed of primarily of red, blue and green light.
Go for lights that have been carefully tuned to this range of the light spectrum. Blue light (400 – 500 nm) primarily has an effect on plant growth and development, increasing production of chlorophyll while those that received red light (600-700 nm), mainly stimulates plant flowering. Both red and blue lights are especially important to plants in their early stages, and gives them strong, healthy stems and leaves when used together.
Other lights in the spectrum counts. While red and blue light are important, I tend to go for full spectrum lights that not only have tuned to these colours, they also have other lights that can be used throughout a plant’s life. It has been researched that some plants also absorb both uv lights (100-400nm) and far red lights (700-850nm) for other benefits like better quality flowers, fruits, root growth and better flowering and stem growth respectively.
On a personal note, full spectrum lights are easier on the eyes and is better for our lifestyle. And best part, they let you see your plants and the pests on them.
If you have a weaker grow light, turning on the light source for longer hours will compensate for the weaker intensity of light it gets.
It’s like filling up a bottle of water but in this case, think of it like filling it up with light photons. This is the Dli (Daily Light integral). DLI is a measure of the number of photosynthetically active photons that you accumulate on a surface over a 24 hour period. DLI = μmol m-2s-1 (or PPFD) x (3600 x photoperiod) / 1,000,000 = DLI (or moles/m2/day). Most foliage plants will need at least 6DLI. You can calculate how many hours you need. For me, unless I am growing vegetables, I will only estimate the time I will need. Taking into account of the number of hours of natural light you have, you will need to leave the lights on longer at night or start earlier in the day. If they look pale and scrawny, weak, leave them longer. Currently, I leave the lights on for about 8 hours. Most plants will need at least 8 hours of darkness to burn the stored energy they create in the day.
Place the light between 30 cm to 60cm away from the plant for best results
For most lights, this is the distance that is most effective and yet does not dry out the plant with its heat, although LED lights comparatively have the least heat emitting from them. But alot also depends on the type of plants you have. If you have a light meter, it will be good to measure the light intensity in lux because some plants especially aroids could be sensitive to a strong intensity of light. Take note also that the higher intensity lights can be placed higher up from a plant to lower its intensity. Start high and slowly move down. You will know your plant is overexposed when you see its leaves turning yellow or white. When in doubt, always refer to the light manufacturer specifications.
Have more than one light shining at an area of plants if your light is less intense or if you want to cover a bigger area.
This is because light footprints that overlap will add up If both your light overlaps, the PPFD will add up and you will have a stronger light intensity.
Look for LED screw bulbs
This the most convenient grow light to have especially for those of us growing our plants at home. These days the LED light bulbs are getting better and there are very professional ones these days with very good specs. Screw them in any lamps you have and it’s good to use. And best of all they save on the electricity bills.
When buying overseas, you may come across light base E26. This is usually the same as what we used here as E27, except for some slight differences in measurements on the base. It will work and safe but if you are very particular, try to use lamps that have a range of wide voltage from 110v to 240v, that will make it safer. Lamps like these are easily available from Ikea. E26 is usually used on a lower voltage in the US. I have been using both interchangeably and there have been no issues.
I HOPE YOU’VE ENJOYED MY POST HERE ON GROW LIGHTS. LOOK OUT FOR MY NEXT ARTICLE ON WHAT LIGHTS I USED ON MY PLANTS. THE ABOVE TIPS ARE WHAT WORKS FOR ME AND MY PLANTS IN MY HOME ENVIRONMENT, AND COULD BE DIFFERENT FOR YOURS. IF YOU HAVE ANY THOUGHTS YOU LIKE TO SHARE, PLEASE COMMENT BELOW OR JUST DM ME ON INSTAGRAM @plant_folksg
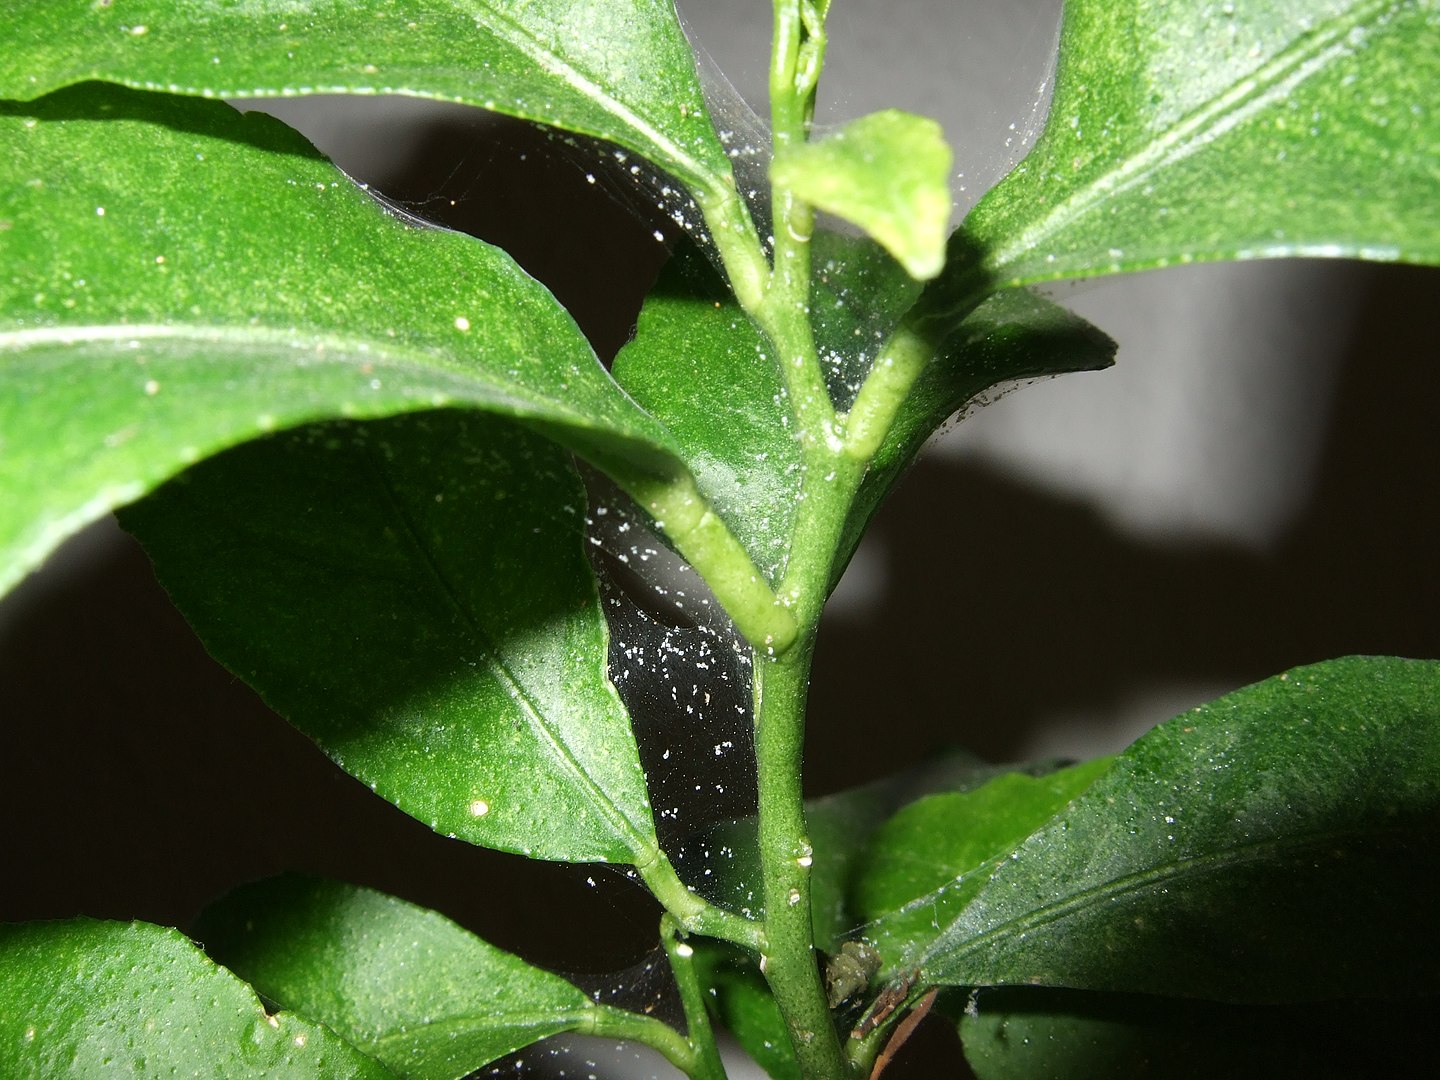
If you are an aroid fan, these mites are definitely no stranger to you. I have been through periods of mites scare during the wet humid months and they are still a problem for me. And I have always been too quick to get rid of them so much so I never got round to taking a good picture. They can easily scar their leafs or destroy your favourite plant in a matter of days.
Here’s some background about spider mites before we dived in. Understanding these bugs is one good way for us to protect our plants. They are labelled as a type of arachnid, relatives of spiders, ticks and scorpions, and live in colonies, mostly on the underside of leaves. They especially love to feed on those aroids with thick, juicy petiole and feed by piercing your leaves and sucking off the plant fluids. The alocasias are one of its favourite targets but the hardy philodendrons are not spared either. Exotic Philodendrons especially those with thick fleshy petiole like the Philodendron Nangaritense and Deflux, and the more common ones like the Imperial red are similarly bitten.
Environment
They thrive in a dusty area and is active when the humidity is a lot higher. They usually attack plants that have higher levels of nitrogen, phosphorous and carbohydrates in their leaves. For me, this always means they are around when my plants are thriving and healthy.
Signs
If you are lucky, you will be able to see some of these signs before the infestations set in.
Tiny yellow or brown dots on the leafs
Tiny yellow or brown dots near the midrib or leaf edges
The tiny dots are feeding marks left by the spider mites as they pierced the leaf. As the feeding continues usually as a colony, the leaves start to turn yellow and drop off in the end.
Webbing
If you see webbing between your leaves, it is a tell-tale sign they are there. Look closely at the leaves especially between the folds of the leaves and their undersides, and you may see a colony of red mites moving about.
Sticky nectar secretes by Philodendrons
Another obvious sign is the sticky secretions that only appear on the leaves of the philodendron. They have this special ability to secrete the nectar on their leaf blades, petiole and inflorescence. So far, I haven’t once seen the nectar secretions without the spider mites just close by. The philos secrete these nectars to attract nearby ants to come to its rescue and feed on the mites. So, go easy on the ant baits that you set up in the house or there will not be any ants left to come help.
Controlling spider mites the organic way
This is not an advertorial and I do not receive a fee for recommending any of the products in this post.
Shower plants Bring the plant to your bathroom and give the leaves a good shower every time you water them. Any spider mites will be washed off.
Tab with rubbing alcohol You can also soak a little kitchen paper with rubbing alcohol or isopropyl alcohol to gently tab on them. This is a tedious method but very thorough way. Any contact with the alcohol will kill them and so they will not hop to nearby plants. The last thing you will want is to brush them off to other nearby plants.
Use systematic (root uptake) pesticide like Starkle G. Although not exactly organic, Starkle G is harmless to us and our pets. These pesticides will make your plant poisonous to the mites . And any feeding on the plant will in turn kill them. This is by far the best method for me because what you want really is prevention so there aren’t any ugly leaf marks left by the feeding.
Neem Oil You can also use organic neem oil to spray your foliage and smother the mites. Neem oil is a road-spectrum organic herbal pesticide and repellent. The neem oil spray from Green Spade is one of the better ones and doesn’t burn as much. But again, I usually only use this as a last resort and only on the thicker leaves because you may miss them even when you do a very thorough foliage spray. Also, neem oil even when diluted can cause leaf burns. Remember to do this only in the early mornings or during the evenings when the weather is a lot cooler.
Homemade Insecticidal soap It is the fatty oils in the soap that kills the mites. So the Ingredients you will need are just organic soap and water. Do not use just any soap because the strong chemicals may be harmful to your plants. Just mix 1 tablespoon of castile soap with 1 litre of water and spray or wipe the leaves of your plant. You can use Dr. Bronner’s pure castile soap. I use this because it has been widely tested by plant owners world -wide and safe. If you are in Singapore, you can find this in Watsons. The peppermint range is fine because it has pure peppermint oil in it as well. Some plant owners will add a little rubbing alcohol/isopropyl alcohol in it, but that is really optional. This is a contact insecticide so spray only when you see the mites. Some times, when you don’t see them, it could also be effective because the solution kills the dormant eggs as well. Remember to spray stem and under the leaves where the mites like to hide. And try to spray only during cooler times of the day so it doesn’t evaporates before it can be of use and remember to patch test this on your plant before spraying just in case it is too strong.
Always try to wipe down your plants. Keeping them clean keep the mites at bay. Also, set the humidifier lower. Spider mites thrive in high humidity and this usually attracts them to feed on the plants, although a very low humidity and dusty environment encourages them to reproduce a lot quicker.
Other chemical sprays I am currently testing out Zagro Abamectin available at Far East Flora which is a broad spectrum systemic insecticide that attacks the nervous system of insects and mites. This a very strong chemical spray that kills through contact as well as uproot intake of the plant and is used on plants with natural protection or really just very elusive. One of the last resorts for me because it is a chemical spray and is often harmful to us on contact and not advisable for indoor plants around us.
I HOPE YOU’VE ENJOYED MY POST HERE ON PROTECTING YOUR HOUSEPLANTS FROM SPIDER MITES. IF YOU HAVE ANY THOUGHTS YOU LIKE TO SHARE, PLEASE COMMENT BELOW OR JUST DM ME ON INSTAGRAM @plant_folksg I WILL LOVE TO HEAR ANY OTHER WAYS YOU MAY HAVE ON PROTECTING YOUR PLANTS FROM THESE PESTS.
We flag off our series on ceramist and artisans with Stefanie who is a talented hand-builder ceramicist from Sydney, Australia. Her handmade pieces are inspired by microbiology and geological formations of coastal and bush landscapes. Due to this, you will often see a little part of Australian’s landscape and culture in her planters. This influence and also her playful mix of glaze and colour defines a unique style in her planters and ceramics.
In the interview below, we have a chat with her to understand more about her inspirations, designs and of course, not forgetting, her favourite plant.
How did you get started in ceramics? Tell us your story. I first got into ceramics when I was 16. I took a work placement at a local pottery studio. I went on to study sculpture at University and upon graduating from art school I got a job in the art world and I stopped doing my own art. One day whilst having lunch with a colleague, they told me I should try doing clay again. I decided to enrol into night classes and after a few months I set up my own studio at home and after a year I decided to set up my own brand and ever since then I have been making pieces.
Where do you draw your inspiration from? I get my inspirations from Australian coral reefs and bushlands.
What would you think best describes the style of your work? My style is a mixture of cute, illustrative and coastal designs.
What has been your highlight over the last year? Finding my style evolved over the last year and becoming an Plant Folks artist were big highlights as well as pursuing sculptural pieces that have been well-received really made the year shine for me.
What is your process of creating one of your planters? What is the most difficult part? I use ‘pinch and slab’ methods. It requires making a slab and once it’s hard enough, I cut and make the forms. The hardest part is the joining of the pieces and keeping the form so that it doesn’t leak.
Which materials fascinate you the most? The Raku process is an area of ceramics which I find so interesting. (Raku generally refers to a type of low-firing process that was inspired by traditional Japanese raku firing.)
Bottlebrushes plant pictures courtesy of wiki.
What is your favourite plant? Tell us about the planter you will like to create for it? In my garden, I love our jellybean succulents but in my local park, I love seeing the Bottlebrushes, they attract so much wildlife. I would love to create coral planters for the succulents and play, it could be an interesting mixture of forms.
Stefanie’s favourite planter was from her first sale.
Which planter from your collections is your personal favourite ? My favourite planter was for my first Etsy sale. The shape was tall and narrow and the glaze came out beautiful.
What does quality mean to you? To me, quality means craftsmanship and a piece that will stand the test of time.
Tell us about a Plant Folk. I love learning about the plants on Plant Folks so I regard myself as one but I would say my husband is a Plant Folk in a way, he has over 110 plants and volunteers as a gardener in our community. He constantly looks out for Monsteras and is studying their names.
Have you seen some of these environment friendly 3D planters in any plant shop recently? The 3D Planters available in our online shop are not just eco-friendly, they are also beautifully made and well-crafted with a fine wood-textured finish. Made of a bio-degradable material known as PLA WOOD, you will be surprised at how it feels and smells like real wood. Here, we try and answer some queries that you may have on this new planter that has taken the world by storm. Here are some facts we thought will be useful. Read on.
Is it safe for your plants?
Polylactic Acid (PLA) is definitely safe since it is made from components derived from plants. It is biodegradable and is also often used in food handling and medical implants that biodegrade within the body over time.
Can I grow my plant straight from the planter?
You can grow your plants directly from the planter as our 3D Planters comes with a drainage hole and the planter does not absorb the water when you water the plants. It will work just like your daily plastic pots but the 3D ones are definitely more sustainable, durable and alot better looking. They definitely treat our environment alot kinder. You can also used them as cache planters if you prefer not to repot your plants.
(left pict) Cute Pilea peperomioides in one of our beautiful 3D planters. <SHOP NOW>
How is PLA eco-friendly?
Compared with ABS, which is a more traditional plastic derived from petroleum oil, PLA is compostable because it is made from natural components like wood and polymer derived from plants such as corn, wheat or beet, rich in natural sugar.
Traditional plastics are not biodegradable; they will be around long after we are gone and often pollute our environment when they end up as litter. Efforts to disintegrate it will hurt our environment and pollute our air.
How are 3D planters created?
Before printing the planters, designers first visualise and use 3D design or modelling software to create the original design. When the design is created, Modern 3D printers are then used to create strong and durable planters, fusing together layers of wood and bio-PLA (Poly Lactic Acid).
PLA is poly lactic acid, a polymer derived from plants such as corn, wheat or beet, rich in natural sugar. It is a strong and durable material with an extraordinary aesthetic effect. PLA WOOD has the same properties as PLA but also contains pine wood fibres. The feeling to the touch and the smell are awesome!
Do they really look like wood planters?
Seeing is believing. Check out this video below of our 3D planters. You can see for yourself the quality and the complexity of the design. Only a good 3D printer and the skill of the designer can realise the complexity of a design and produce it into an aesthetically beautiful, well-crafted planter.
Plant Folks Stories is a series about the people living with plants and how they have brought greenery into their homes to create beautiful green spaces.
Starring:Amy Toi, Felix the cat
Plant count: 80
First in our series is this shy plant lady that has such a beautiful collection of plants in her balcony, you feel her cat must be the luckiest one in the block. He gets to admire this beautiful jungle everyday but Felix doesn’t look like he is jumping for joy as he takes it in his stride and does his usual elegant feline strut through Amy’s forest. I bet he is really happy with the plants and even more so when he sees the mulberry plant. I had a chat with Amy to find out more about her plants and their relationship with Felix. Read on.
How did you get started on plants? Tell us about your plant journey. I started my plant journey in 2010 in my old apartment. It all started with a promise to my cats. It sounds silly but I imagined a garden with them running in it. A garden… I couldn’t afford thus the balcony was filled with plants to fulfil my promise to them.
What has been your highlight over the last year? Getting to work from home and being able to be with Felix and my plants every single day. The plants in my balcony are flourishing and Felix has more affection for me too.
Tell us about your most treasured/favourite plant at home? How do you take care of it?
It would be my Anthurium Clarinervium. I place it in my balcony away from direct sunlight. It’s also placed close to other plants.
Where do you grow your plants at home? Tell us about your green space at home. I grow most of my plants in my tiny balcony. I’d like to call it my tiny sanctuary. My first plant here was my Aloe Vera. It has grown into quite a monster. I then added some orchids and placed them onto the vertical shelf. It has been 5 years and the orchids are still there and has rooted themselves on the shelf and also onto the wall. It’s crazy how strong the roots are as I’m not able to remove them at all. The plant collection has increased year after year but there was an increase in my plant acquisition in 2020 specifically at the end of Q1 😂
Lovely collection of Monstera, Aglaonema, Anthurium, Alocasia, Ficus, Orchids in the balcony
What will be your advice to new plant owners growing plants indoors? Start small and not get too many plants at one go. Pothos will be great for a start as they are non-fussy plants and you can propagate it easily.
What do you use on your plants? NPK, rice water, coffee grounds, dry eggshells which I grind finely and also Plantonic.
Why coffee grounds, dry eggshells? Coffee ground just releases some potassium and minerals ‘machiam’ (similar to) slow release fertiliser. As for the eggshell, that was advice from my parents.
What do you look for in a planter? Handmade ceramic pottery and any aesthetically pleasing looking one with a drainage hole.
Share a plant tip with us NEVER OVERWATER!
What’s on your wishlist? Thai Constellation
Tell us about a plant project you have in mind?
I’d like to fix a longer and better looking rod in my balcony so that I can accommodate more plants to hang from above. The floor space in the tiny balcony is on max capacity for anymore plants.
Tell us about your cat Felix and his relationship with your plants Felix enjoys sitting in the balcony amongst the plants. My fur son lacks discipline but somehow he knows what I love and respect them. He only chose to bite and eat the leaves of the mulberry plant. I used to have strawberry plants but one night I found him in the plant bed eating the leaves and digging the soil. I stopped growing strawberries as they just die due to the lack of leaves. Felix loves eating vegetables too.
Felix the cat and his mulberries
Here are pictures of other green spaces we spotted in her instagram (@amy_toi). All pictures with permission from Amy.
hoya pachyclada blooming
hoya and orchid hanging off the wall in the balcony garden
previous bloom from the orchid
plants in a bright spot with a great view
philodendron xanadu in the spotlight
dischidia & lycopodium hanging at the balcony garden